

RV Water Heater Care & Maintenance

Proper RV water heater maintenance relies on inspection & awareness.
Sacrificial Anode Rod
Some RV water heaters have a sacrificial anode rod within the tank increases the life of the tank and under normal use will deteriorate. The anode rod should be checked yearly or more frequently if water supplies contain high levels of iron or sulfate and replaced as necessary.
Exterior Door Screen
Another important maintenance procedure is periodically checking the water heater screen in the exterior door for any obstructions, such as animal /insect nests or debris. Proper ventilation is essential to the safe operation of the water heater.
Check for Soot
If soot is present anywhere, shut the unit down until it can be repaired. Soot is a sign of incomplete combustion and should be corrected before operating the RV water heater. A qualified technician should do any repairs that need to be performed.
RV Water Heater Pressure Relief Valve
Weeping or Dripping As in residential water heaters, the water heater equipped in recreational vehicles contain a pressure relief valve that is designed to open if the temperature of the water within reaches 2 0 degrees F or if excessive pressure is built up. When pressure reaches 50 pounds, the relief valve will open and water will drip from the valve. The valve will close automatically once the pressure falls below 50 pounds. This dripping is normal and does not indicate a malfunctioning or defective valve.
Also, as water is heated it expands and with the closed water system in a recreational vehicle, water expansion will cause weeping at the pressure relief valve. One way to minimize this weeping is by maintaining an air pocket at the top of the water heater tank. The air pocket forms naturally by design but will reduce overtime through normal use.
Replenishing the RV Water Heater Air Pocket
- Turn off water heater.
- Turn off cold water supply.
- Open a faucet in the RV. to relive pressure.
- Allow time for water to cool and Pull out handle of the Pressure Relief Valve and allow water to flow from the valve until it stops.
- Release handle on valve... it should snap shut.
- Close faucet and turn on cold water supply, as tank fills, the air pocket will be replenished.
Draining & Storage RV Water Heater
When not using RV water heater for long periods such as storing the RV during the winter months, the water heater should be drained to avoid damage from freezing during the winter and / or deterioration of tank life from mineral content in water supplies.
To Drain the RV Water Heater
- 1.Turn off power to the water heater at the switch or the main breaker.
- Shut off the gas supply and the water pump.
- Open all fixtures, both hot and cold throughout the unit.
- Place the bypass valve (if equipped) in the by-pass position.
- Remove/open the exterior access door to the water heater.
- Remove the anode rod from the tank. Water will drain out tank.
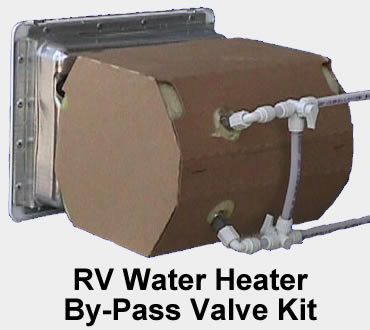 RV Water Heater By-Pass Kit
The by-pass kit is a popular convenience feature that allows for easier drainage of the hot water heater tank and winterization of the unit. The by-pass kit is installed near the cold water inlet of the water heater and allows for blockage of water flow into the water heater, saving time and reducing the amount of anti-freeze needed during winterization.
Water Supply & Odor
Water supplies sometimes contain high levels of sulphur, which causes an unpleasant smell, similar to rotten eggs. While unpleasant, the water is not harmful. Sanitizing the water system, as described earlier and allowing the sanitizing solution to remain for a few days, should eliminate the odor. Remember to thoroughly flush the system after sanitization. Adding a filtration system will help reduce such occurrences.
The information above is provided as general information. Please carefully read the manufacturers users manual for complete operational and safety instructions.
You may also want to read: RV Water Heater Basics